Windows 11 Performance Tips are essential for anyone who wants to get the most out of their PC. When you first upgrade to Windows 11, everything feels lightning-fast and smooth. But after a few months of installing apps, downloading files, and browsing the web, that initial speed can start to fade. It’s a frustrating but common problem. The good news is that you don’t need to be a tech expert to reclaim that lost speed. With a few simple tweaks and habits, you can significantly boost your PC’s performance and enjoy a snappier, more responsive computing experience.
This isn’t about deep-diving into complex registry hacks or buying expensive new hardware. This guide is written for the everyday user—someone who just wants their computer to work without annoying slowdowns. We’ll cover easy-to-implement strategies, from managing startup apps to simple visual adjustments, that collectively make a massive difference. If your Windows 11 PC has started to feel sluggish, sticky, or just plain slow, you’ve come to the right place. Let’s dig in and make your PC feel brand new again!
Section 1: The Foundations of Speed—Initial Cleanup
Before we get into advanced settings, we must address the most common culprits for performance drag: clutter and background processes. Think of your computer like a workshop; if it’s full of unnecessary tools lying around and machines running idle, you can’t work efficiently.
1. Tame the Startup Apps
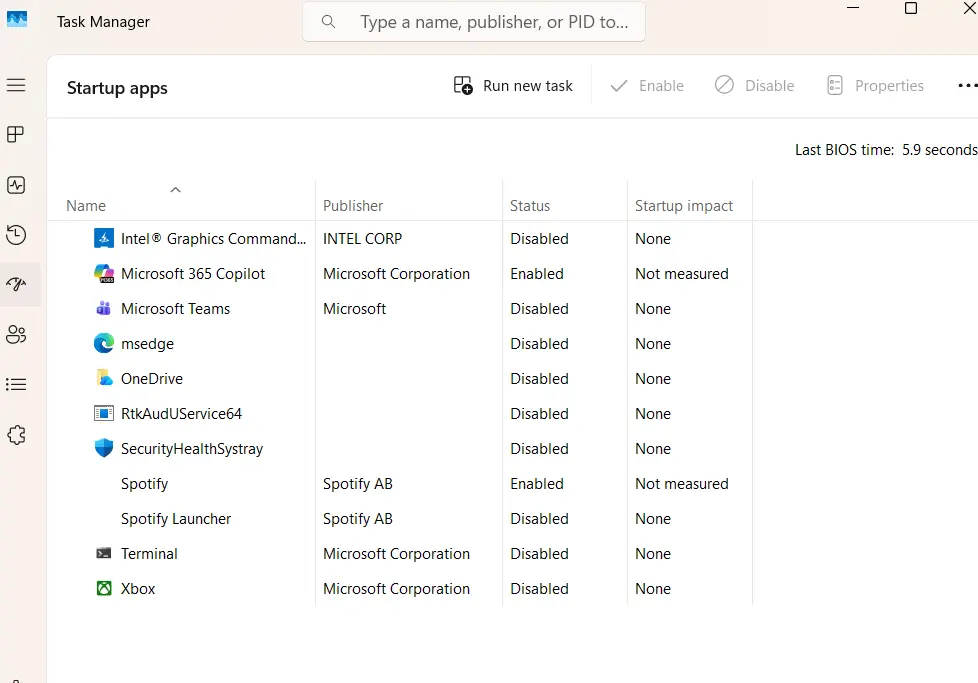
The single biggest factor in boot-up time and initial slowdown is the number of programs that automatically launch when you turn on your PC. Many applications—like Spotify, communication tools, and even printer utilities—set themselves to start automatically, even if you don’t need them right away.
- How to Fix:
- Right-click the Start button and select Task Manager.
- Click on the Startup tab.
- Look at the list and observe the Startup impact.
- If you see an app with “High” impact that you don’t need immediately (e.g., Skype, Epic Games Launcher), right-click it and select Disable.
- Pro Tip: Only disable apps you recognize. Leave anything related to “Microsoft,” “Windows,” or your hardware manufacturer alone unless you’re certain it’s safe.
2. Declutter Your Storage (The Simple Way)
While a full hard drive doesn’t always slow down your PC, having less than 10-15% free space can definitely impact performance, especially if you’re using an older mechanical hard disk (HDD).
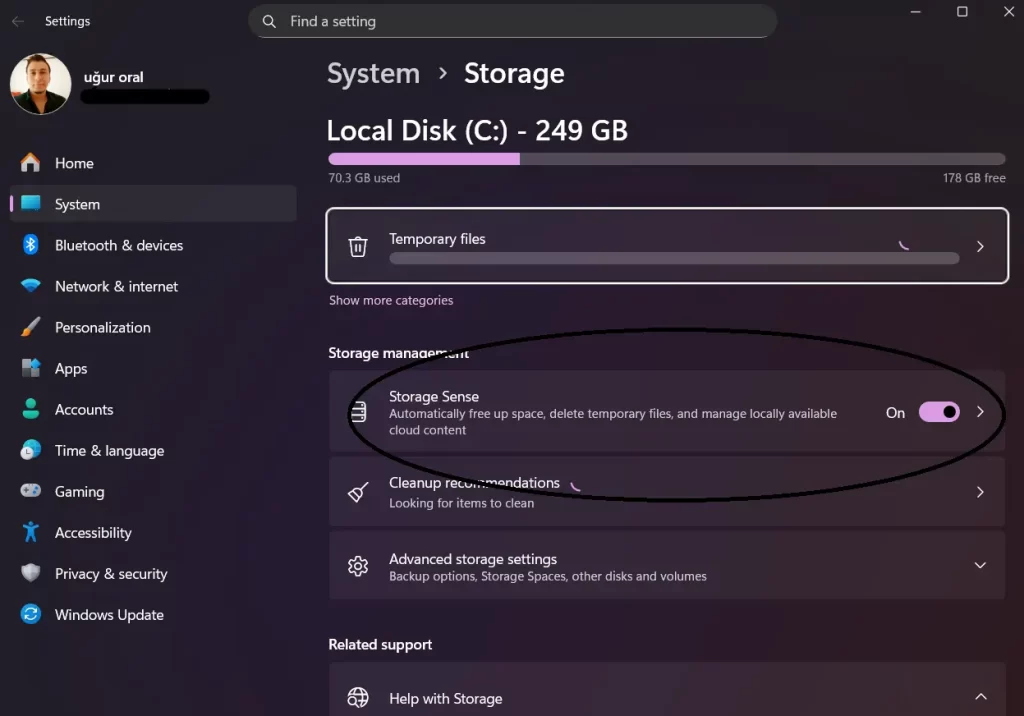
- Use Storage Sense: Windows 11 has a fantastic built-in tool called Storage Sense.
- Go to Settings > System > Storage.
- Turn Storage Sense On.
- Click on Storage Sense to configure it. Set it to automatically delete temporary files, files in your Recycle Bin, and old downloads that haven’t been opened in a while. This is automated maintenance that you set and forget.
3. Uninstall Unused Software (The Digital Dust-Bunnies)
Do you have a trial version of a program you haven’t touched in six months? Get rid of it. Every application takes up disk space and, more importantly, can leave behind background services that drain resources.
- How to Fix:
- Go to Settings > Apps > Installed apps.
- Sort the list by Install date or Size.
- Carefully review the list and uninstall anything you no longer use. If you see something you don’t recognize, do a quick search online before uninstalling.
Section 2: The Subtle Tweaks—Visual and Power Management
Windows 11 is beautiful, with its rounded corners, transparency effects, and smooth animations. However, all that eye candy requires processing power. By reducing some of these visual flourishes, you can free up resources for more important tasks.
4. Minimize Visual Effects
This tip is particularly effective for PCs with less powerful or older graphics cards (integrated graphics).
- How to Fix:
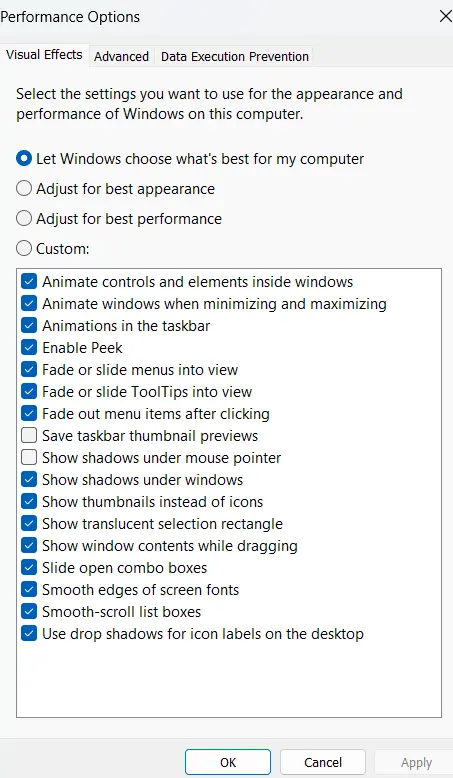
- Search the Windows taskbar for “Adjust the appearance and performance of Windows” and open it.
- In the Visual Effects tab, instead of “Let Windows choose,” select Adjust for best performance.
- Alternatively, select Custom and re-enable only the effects you truly need, such as “Smooth edges of screen fonts.” Disabling things like “Animate controls and elements inside windows” or “Show shadows under windows” will make a noticeable difference in responsiveness.
5. Switch to a Better Power Plan
If you’re using a laptop and running on the default “Balanced” power plan, Windows is prioritizing battery life over speed. If you’re plugged in, you should always opt for performance.
- How to Fix (Desktop Users):
- Search for “Edit power plan” in the Start menu.
- Click Power Options in the address bar.
- Select the High performance plan. If you don’t see it, you might need to click “Show additional plans.”
- Note: Only use this when plugged in. Running on high performance on battery will drain it very quickly.
6. Stop Background Apps from Hogging Resources
Even if they don’t appear in the startup tab, some Windows Store apps are designed to run in the background to receive notifications or update live tiles.
- How to Fix:
- Go to Settings > Apps > Installed apps.
- Find an app you rarely use (like the default Mail app if you use a browser-based client) and click the three-dot menu next to it.
- Select Advanced options.
- Under Background apps permissions, change the setting from “Power optimized (recommended)” to Never. This completely stops it from consuming resources when you’re not using it.
Section 3: Deep Maintenance and Pro Tips
These final Windows 11 Performance Tips require a little more technical know-how but are crucial for long-term health.
7. Use the System File Checker (SFC)
Sometimes, important Windows system files can become corrupted, leading to strange errors and slowdowns. The System File Checker (SFC) tool scans and repairs these files automatically.
- How to Fix:
- Search for “cmd” in the Start menu.
- Right-click Command Prompt and select Run as administrator.
- Type:
sfc /scannowand hit Enter. - Let the scan complete (it can take 5-20 minutes). If it finds and fixes errors, you’ll see a confirmation message.
8. Keep Windows Up-to-Date (But Smartly)
Microsoft constantly releases updates that include performance improvements and bug fixes. Don’t avoid them. However, sometimes a faulty driver can slip through.
- How to Fix:
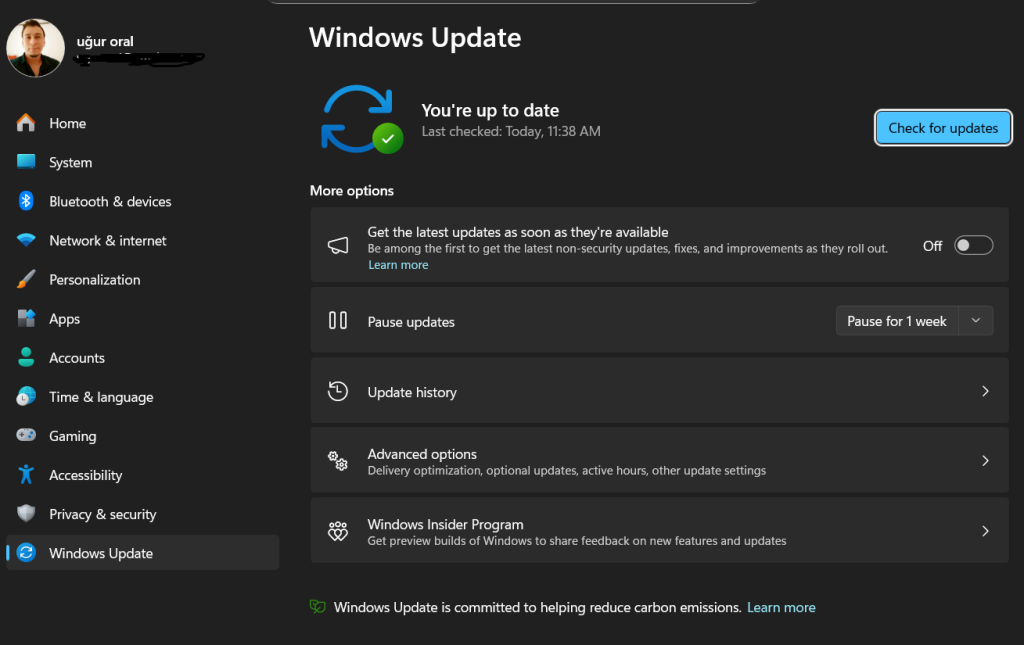
- Go to Settings > Windows Update and ensure you’re up to date.
- If you notice a slowdown immediately after an update, you can try rolling back the latest driver. Search for “Device Manager,” find the device (usually under Display adapters), right-click, select Properties, go to the Driver tab, and click Roll Back Driver.
9. Regularly Defragment/Optimize Drives
- IMPORTANT: If you have a modern Solid State Drive (SSD), Windows 11 handles optimization automatically—it’s not called defragmenting, and you shouldn’t manually do it constantly.
- How to Fix:
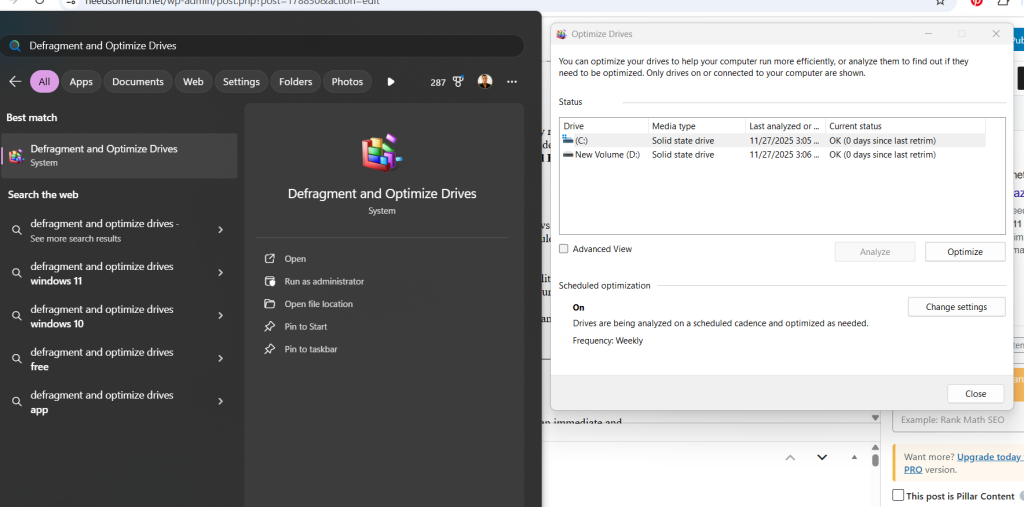
- Search for “Defragment and Optimize Drives” and open the utility.
- Verify that your SSDs are listed with “Solid state drive” and the current status is “OK (Trimmed).” The OS schedules these trims weekly.
- If you have an older mechanical HDD, ensure the status is “OK” and it has been recently defragmented. If not, click Optimize.
Final Thoughts: The Key to Lasting Performance
Implementing just a few of these Windows 11 Performance Tips will make an immediate and positive impact on your system’s responsiveness. The true secret to lasting speed, however, is consistency. Making a habit of regularly checking your Startup apps, running Storage Sense, and cleaning up your desktop will ensure that your PC maintains that ‘like-new’ speed for years to come.
You don’t need a brand new computer; you just need to manage the one you have efficiently. Give these tips a try—you’ll be amazed at how much faster your everyday computing can be!
