My frame times on a CPU-heavy shooter were all over the place last month, and it turned out Virtualization-Based Security was quietly eating overhead in the background the whole time. If you’re trying to disable VBS in Windows 11 for better gaming performance, it’s a five-minute fix — but there are a few things worth knowing before you flip the switch.
Quick Answer
- Check current status: Win + R, type
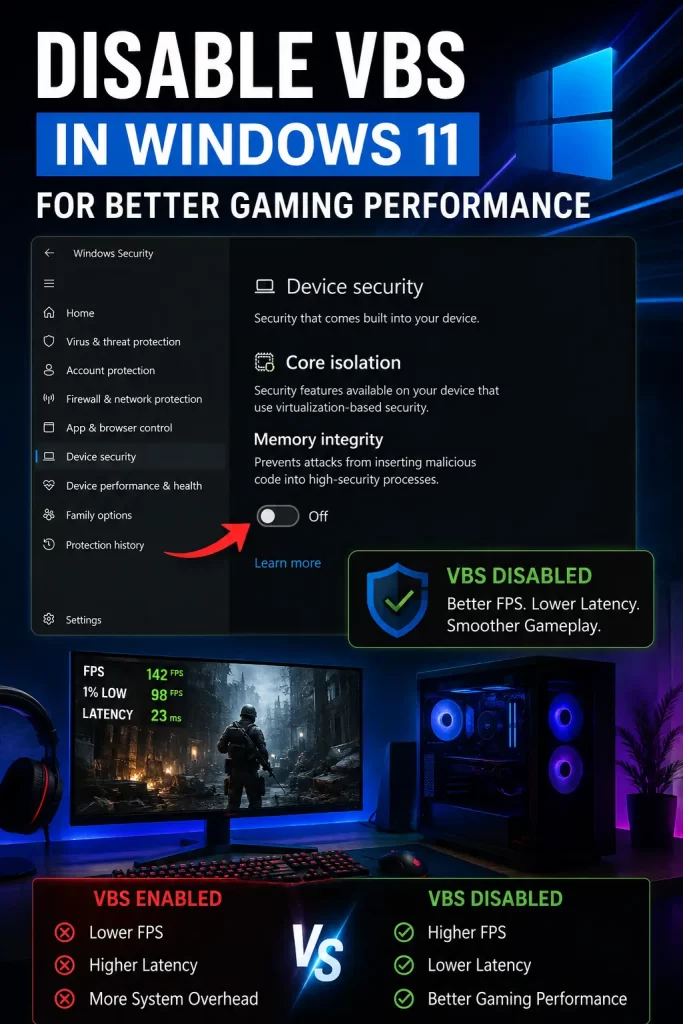
msinfo32, look for “Virtualization-based security” — Running means it’s on - Fastest method: Windows Security > Device Security > Core Isolation > turn off Memory Integrity, then restart
- Registry method: set
EnableVirtualizationBasedSecurityto 0 underHKEY_LOCAL_MACHINE\System\CurrentControlSet\Control\DeviceGuard - Stubborn systems may need CPU virtualization disabled in BIOS as a last resort
- Expect roughly 5-15% FPS gains in CPU-bound games, less in GPU-bound titles
Why It Fails to Turn Off (or Turns Back On)
VBS isn’t a single toggle, it’s a stack of settings — group policy, registry, a hypervisor flag, and sometimes a firmware dependency. That’s the annoying part, and it’s why one method works for one person and does nothing for the next.
Memory Integrity toggle alone doesn’t always cover it. On a lot of consumer machines, turning off Memory Integrity in Windows Security is enough because nothing else is enforcing VBS. But if a policy or registry key is separately forcing it on, the toggle reverts after reboot.
Windows updates re-enable it. So this one catches people off guard constantly. A feature update, or even a routine cumulative update, can silently flip VBS back on even if you disabled it months ago. Don’t assume a setting you changed once is permanent.
Domain-joined or OEM-imaged machines have policy locks. If the PC was ever set up through an organization, or came pre-configured by certain OEMs with “enhanced security” defaults, Group Policy or MDM settings might be actively enforcing VBS. Toggling the Windows Security switch won’t override that.
Some newer hardware bakes it in more aggressively. Microsoft and OEMs have been pushing VBS as a baseline security posture, especially on newer CPU generations. On a few of these systems, the standard consumer-facing toggles genuinely don’t fully disable it, and you have to go to the firmware level.
An overlooked cause: third-party security software re-enabling it. Some endpoint protection tools and even certain antivirus suites will silently turn VBS back on as part of their own hardening checks, especially after they update. If your setting keeps reverting and you’re running anything beyond Windows Defender, that’s worth checking before you blame Windows itself.
Common Scenarios
- Fresh Windows 11 install on a new gaming PC — VBS is often on by default now, even on builds where it used to ship off
- Post-Windows-10-to-11 upgrade — some machines carry over settings, others get VBS turned on fresh by the upgrade process itself
- Laptops with “enterprise security” branding — Dell, HP, and Lenovo business lines sometimes enforce VBS harder than consumer lines
- Machines that also run WSL2, Docker, or Hyper-V — disabling VBS here has side effects you’ll want to think through first
Step-by-Step Fixes
Step 1: Check whether VBS is actually running
Press Win + R, type msinfo32, hit Enter. Scroll the System Summary pane to “Virtualization-based security.” If it says Running, you’re paying the overhead right now. If it already says Not enabled, you’re done — don’t go making registry changes for no reason.
Step 2: Disable Memory Integrity through Windows Security
Search “Core Isolation” in the Start menu, open it, toggle Memory Integrity off, and restart when prompted. This is the fix that works most often in practice — for most home gaming rigs, this single toggle takes down the whole VBS stack.
Step 3: If it’s still running, use the registry
Open regedit (Win + R, type regedit). Navigate to:
HKEY_LOCAL_MACHINE\System\CurrentControlSet\Control\DeviceGuardFind (or create) a DWORD value named EnableVirtualizationBasedSecurity and set it to 0. Close regedit and restart.
Back up the registry key or create a system restore point before touching this — not because it’s especially dangerous, but because it’s just good practice whenever you’re editing DeviceGuard settings.
Step 4: Check Group Policy (Pro/Enterprise editions only)
Run gpedit.msc, navigate to Computer Configuration > Administrative Templates > System > Device Guard, and open “Turn On Virtualization Based Security.” Set it to Disabled. Windows Home doesn’t have gpedit, so skip this on Home editions — the registry method above is your equivalent.
Step 5: Last resort — disable virtualization in firmware
If VBS keeps showing as Running after all of the above, the hypervisor itself might be getting invoked at the firmware level. Enter BIOS/UEFI, find Intel VT-x or AMD-V (sometimes labeled SVM Mode), and disable it. This is the least elegant option because it kills virtualization system-wide, not just VBS — meaning WSL2, Hyper-V, Docker Desktop, and most emulators stop working too.
What Actually Worked For Me
I disabled Memory Integrity through Windows Security first, restarted, checked msinfo32 — still said Running. That threw me off because that toggle is supposed to be the whole fix on most consumer setups. Went into the registry, set EnableVirtualizationBasedSecurity to 0, restarted again. Still running.
Turned out this particular laptop was an OEM business model, and there was a Group Policy setting enforcing VBS that I hadn’t thought to check because I assumed it was a personal, non-domain machine. Ran gpedit, found “Turn On Virtualization Based Security” set to Enabled under Device Guard, flipped it to Disabled, restarted one more time. Finally showed Not enabled. Took three restarts total to get there, which is more than the tutorials make it sound like.
Advanced Fixes and Edge Cases
Check for third-party enforcement. If you’re running enterprise-style antivirus or endpoint protection, check its hardening or “attack surface reduction” settings — some of them re-enable VBS independently of Windows.
Verify after every major update. Feature updates in particular have a track record of resetting security defaults. Get in the habit of checking msinfo32 after any big Windows update, not just once after your initial fix.
Credential Guard is a related but separate feature. If you’re specifically trying to kill VBS for performance and Credential Guard is also enabled, disabling VBS alone may not fully release the overhead — Credential Guard depends on the same virtualization layer and sometimes needs its own registry key cleared.
PowerShell verification. For a more scriptable check than msinfo32, Get-CimInstance -ClassName Win32_DeviceGuard -Namespace root\Microsoft\Windows\DeviceGuard will show VBS status and which security services are currently running, which is handy if you want to automate a check after every reboot.
Prevention Tips
- Don’t disable VBS system-wide if you also rely on WSL2, Hyper-V, or Docker — weigh the trade-off first
- Recheck msinfo32 after every Windows feature update
- If your PC is domain-joined or came from a corporate deployment, talk to IT before disabling anything security-related
- Keep a system restore point before registry edits, even simple ones
Prevention Note on Security Trade-offs
This is worth saying plainly: VBS exists to stop malicious code from getting into protected memory regions, and disabling it does lower that protection. For a dedicated gaming rig that’s isolated from sensitive work data, most people consider the trade worth it. For a daily-driver laptop that also handles banking or work logins, it’s a more personal call, and your mileage may vary depending on what else you’re running.
FAQ
Will disabling VBS void my warranty or break anything permanently? No. It’s a reversible software setting, not a hardware modification.
Do I need to disable VBS on a system with a strong GPU? Probably not much benefit — if your games are GPU-bound rather than CPU-bound, the FPS gain from disabling VBS tends to be minimal.
Why did VBS turn back on after I already disabled it? Almost always a Windows update. Check msinfo32 again after any major update and redo the fix if needed.
Is there a performance difference between disabling via toggle vs registry vs BIOS? Not once VBS is actually off — the end result is the same. The methods differ in how deep they reach and how likely they are to actually stick.
Can I disable VBS on Windows 11 Home? Yes, through Windows Security or the registry. Group Policy Editor isn’t available on Home, so skip that method.
Editor’s Opinion
gonna be honest, for most people the fps gain here is noticeable but not life changing — like 5 to 10 percent in cpu bound games, more if your specific title is chasing high refresh rates. worth doing on a dedicated gaming rig imo. worth thinking twice about on a laptop you also use for anything sensitive. and don’t be surprised when a windows update quietly turns it back on, check msinfo32 every once in a while instead of assuming it stuck.
