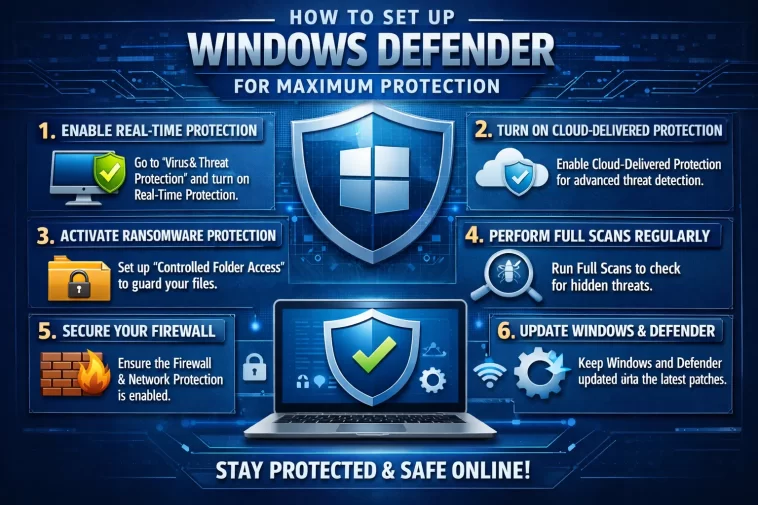
Windows Defender comes pre-installed on every Windows 10 and Windows 11 machine — but most people never touch the settings. They assume it’s already doing everything it can. It isn’t.
Out of the box, several of Defender’s most powerful protection features are either turned off or set to their minimum configuration. Taking 10–15 minutes to set things up properly makes a real difference.
This guide walks you through every setting you need to configure, step by step, to get maximum protection from Windows Defender — no paid software required.
Before You Start: Open Windows Security
All Windows Defender settings live inside the Windows Security app. Here’s how to open it:
- Click the Start menu
- Type Windows Security and press Enter
- Or click the shield icon in the system tray (bottom-right corner)
You’ll see the main dashboard with several protection categories. Work through each section below.
Step 1: Enable Real-Time Protection
This should already be on, but verify it first — some apps disable it during installation and forget to re-enable it.
How to check:
- Open Windows Security
- Click Virus & threat protection
- Under Virus & threat protection settings, click Manage settings
- Make sure Real-time protection is toggled On
If it’s off, toggle it back on immediately. Real-time protection is the core of Defender — without it, files are only scanned on demand.
Step 2: Turn On Cloud-Delivered Protection
This is one of the most important settings — and many users have it off without realizing it.
Cloud-delivered protection sends information about suspicious files to Microsoft’s servers, which can identify threats in seconds using data from millions of devices worldwide. It dramatically improves detection of new and unknown malware.
How to enable it:
- Go to Virus & threat protection → Manage settings
- Toggle Cloud-delivered protection to On
- Toggle Automatic sample submission to On (this sends suspicious files to Microsoft for analysis)
Why it matters: Without cloud protection, Defender only compares files against its local virus definition database. With it, you get real-time intelligence from Microsoft’s global threat network.
Step 3: Enable Tamper Protection
Tamper Protection prevents malicious software — and even other applications — from disabling Windows Defender’s security features. Without it, some malware can simply turn Defender off before doing damage.
How to enable it:
- Go to Virus & threat protection → Manage settings
- Scroll down to Tamper Protection
- Toggle it On
Once enabled, Defender’s core settings can only be changed through the Windows Security app — not through PowerShell, registry edits, or third-party apps. This is exactly what you want.
Step 4: Set Up Controlled Folder Access (Ransomware Protection)
This is Defender’s most underused feature. Controlled Folder Access blocks unauthorized apps from modifying files in protected folders — your Documents, Pictures, Desktop, and more. It’s specifically designed to stop ransomware from encrypting your files.
How to enable it:
- Go to Virus & threat protection
- Scroll down to Ransomware protection
- Click Manage ransomware protection
- Toggle Controlled folder access to On
Adding Protected Folders
By default, Windows protects your main user folders. You can add more:
- Under Controlled folder access, click Protected folders
- Click Add a protected folder
- Navigate to any folder you want to protect (external drives, custom folders, etc.)
- Click Select Folder
Allowing Trusted Apps
Some legitimate apps (like photo editors or backup tools) may get blocked by Controlled Folder Access. Here’s how to allow them:
- Under Controlled folder access, click Allow an app through Controlled folder access
- Click Add an allowed app
- Choose Recently blocked apps to see what’s been blocked, or browse to the app manually
Step 5: Configure Automatic Sample Submission
This works alongside cloud-delivered protection. When Defender finds a suspicious file it can’t identify, it sends a sample to Microsoft for analysis. The result comes back quickly and improves protection for all users.
How to check:
- Go to Virus & threat protection → Manage settings
- Make sure Automatic sample submission is toggled On
If you’re concerned about privacy, you can review what gets submitted — Microsoft only sends files flagged as potentially malicious, not random documents.
Step 6: Turn On Network Protection
Network Protection extends Defender’s reach to your internet connection. It blocks access to known malicious domains, phishing sites, and exploit-hosting URLs — even in browsers other than Edge.
This feature is off by default and requires a quick PowerShell command to enable.
How to enable Network Protection:
- Click Start, type PowerShell
- Right-click Windows PowerShell and select Run as administrator
- Type the following command and press Enter:
Set-MpPreference -EnableNetworkProtection Enabled- To verify it’s active, type:
Get-MpPreference | Select EnableNetworkProtectionIf the result shows 1, it’s enabled.
Why this matters: Without Network Protection, Defender only scans files — it doesn’t block dangerous websites in non-Edge browsers. Enabling this adds a meaningful layer of web protection.
Step 7: Schedule Regular Full Scans
Real-time protection catches most threats as they happen, but a scheduled full scan acts as a safety net for anything that might have slipped through.
How to schedule a scan:
- Click Start, type Task Scheduler, and open it
- In the left panel, navigate to: Task Scheduler Library → Microsoft → Windows → Windows Defender
- Double-click Windows Defender Scheduled Scan
- Click the Triggers tab, then New
- Set your preferred schedule — weekly is recommended (Sunday night or Monday morning works well)
- Click OK and confirm
Alternatively, you can trigger a manual full scan anytime:
- Open Windows Security → Virus & threat protection
- Click Scan options
- Select Full scan
- Click Scan now
Step 8: Enable Windows Defender Firewall
The built-in firewall monitors incoming and outgoing network traffic. Make sure it’s active on all network profiles.
How to verify:
- Open Windows Security
- Click Firewall & network protection
- Check that the firewall is On for all three profiles:
- Domain network
- Private network
- Public network
If any show as Off, click on that profile and toggle the firewall back on.
For public networks (coffee shops, airports, hotels), make sure Block all incoming connections is checked. This prevents other devices on the same network from connecting to your machine.
Step 9: Check App & Browser Control Settings
This section controls SmartScreen — Defender’s filter for malicious apps and websites.
How to configure:
- Open Windows Security
- Click App & browser control
- Under Reputation-based protection, click Reputation-based protection settings
Set the following:
- Check apps and files → Warn (or Block)
- SmartScreen for Microsoft Edge → Warn (or Block)
- Potentially unwanted app blocking → On — enable both “Block apps” and “Block downloads”
- SmartScreen for Microsoft Store apps → Warn
Potentially unwanted app (PUA) blocking is especially worth enabling. It catches browser toolbars, adware bundlers, and software that isn’t technically malware but behaves badly.
Step 10: Run Windows Defender Offline Scan
Some malware — particularly rootkits — loads before Windows starts, making it invisible to regular scans. The Offline Scan restarts your computer into a special environment and scans before the OS loads, catching threats that hide during normal operation.
You don’t need to run this regularly. Do it if:
- You suspect your computer is infected but scans find nothing
- Your PC is behaving strangely (slow, crashing, unusual activity)
- You want a thorough clean sweep on a new or newly reset device
How to run it:
- Go to Virus & threat protection → Scan options
- Select Microsoft Defender Antivirus (Offline scan)
- Click Scan now
- Click Scan to confirm — your PC will restart and run the scan before Windows loads
The process takes 10–15 minutes. Your computer will restart normally when complete.
Step 11: Keep Windows Updated
Defender’s virus definitions update automatically through Windows Update — but only if Windows Update is working properly. Outdated definitions leave gaps in protection.
How to check:
- Open Settings → Windows Update
- Click Check for updates
- Install any pending updates, including Optional updates which sometimes include Defender definition updates
Set Windows Update to download and install updates automatically if it isn’t already:
- Go to Settings → Windows Update → Advanced options
- Make sure Receive updates for other Microsoft products is toggled On
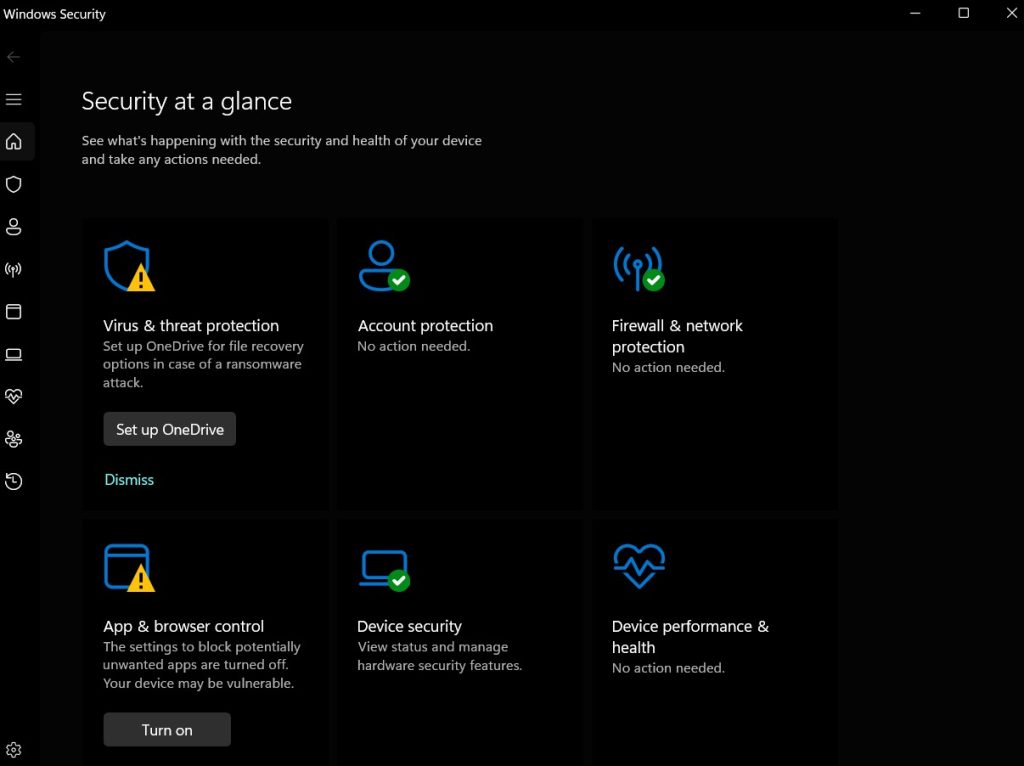
Step 12: Review Your Security at a Glance
Once you’ve configured everything, do a final check on the main Windows Security dashboard.
What to look for:
- All sections should show a green checkmark
- Any yellow warning icons need attention
- Red icons indicate something is disabled or broken
The dashboard also shows your Security score (in Windows 11) — a quick visual indicator of how well your device is protected. After following this guide, it should be high.
Quick Settings Checklist
Here’s everything covered in this guide at a glance:
- ✅ Real-time protection — On
- ✅ Cloud-delivered protection — On
- ✅ Automatic sample submission — On
- ✅ Tamper Protection — On
- ✅ Controlled folder access (Ransomware protection) — On
- ✅ Network Protection — Enabled via PowerShell
- ✅ Scheduled full scan — Weekly
- ✅ Windows Firewall — On for all profiles
- ✅ SmartScreen — Warn or Block
- ✅ Potentially unwanted app blocking — On
- ✅ Windows Update — Automatic, up to date
If every item on this list is checked, your Windows Defender setup is as strong as it can be.
Is This Enough? Or Do You Still Need Paid Antivirus?
After following every step in this guide, Windows Defender provides solid, real protection for most users. You’ll have:
- Real-time malware scanning
- Ransomware protection
- Phishing and malicious site blocking
- Network-level threat protection
- Firewall monitoring
What you still won’t have:
- A VPN for public Wi-Fi
- A password manager
- Dark web monitoring
- Identity theft protection
- Cross-platform coverage for phones and tablets
If those features matter to you, a paid suite like Norton 360 Deluxe or Bitdefender Total Security fills those gaps. But for a free solution, a properly configured Windows Defender is genuinely capable.
Frequently Asked Questions (FAQ)
Does configuring Windows Defender slow down my PC?
No. Windows Defender is deeply integrated into Windows and has minimal performance impact even with all settings fully enabled. Enabling cloud protection and network protection adds no noticeable overhead on modern hardware.
How often should I run a full scan?
Once a week is recommended for most users. If you download files frequently, open email attachments, or visit a wide range of websites, twice a week is better. Real-time protection handles day-to-day threats; scheduled scans are a safety net.
What is Tamper Protection and why does it matter?
Tamper Protection prevents malware and unauthorized apps from disabling Defender’s security features. Without it, sophisticated malware can turn off real-time protection before infecting your system. Always keep it on.
Can I use Windows Defender with another antivirus?
Running two real-time antivirus tools simultaneously usually causes conflicts. The exception is Malwarebytes Premium, which is designed to complement Defender rather than replace it. If you install a third-party antivirus, Defender automatically switches to a passive mode.
What is the Windows Defender Offline Scan?
It’s a scan that runs before Windows fully loads, allowing Defender to detect rootkits and other malware that hides during normal operation. It’s not needed regularly — run it if you suspect an infection that normal scans aren’t catching.
Is Controlled Folder Access worth enabling?
Yes, especially for ransomware protection. It prevents any unauthorized app from modifying files in your protected folders. The only downside is occasional false positives with legitimate software — easily fixed by adding trusted apps to the allow list.
How do I know if Windows Defender is up to date?
Open Windows Security → Virus & threat protection → scroll to Virus & threat protection updates and click Check for updates. You can also see the last update date there. Keeping Windows Update enabled ensures definitions stay current automatically.
