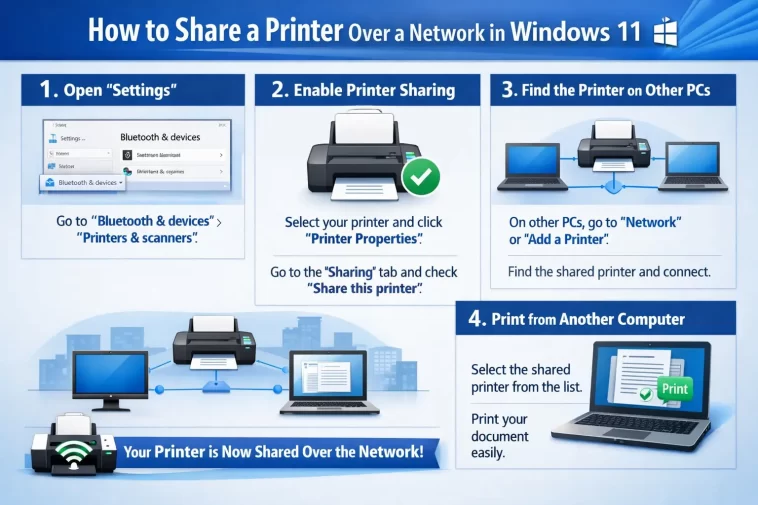
Sharing a printer over a network in Windows 11 lets every device in your home or office use one printer — without running cables to each computer or buying multiple devices. Once it’s set up, printing from any PC on your network is just as easy as printing from the one the printer is physically connected to.
This guide covers everything: enabling network sharing, connecting from other PCs, fixing common problems, and a FAQ section at the end for quick answers.
What You Need Before You Start
Before setting anything up, make sure you have the following in place:
- The printer is physically connected to one Windows 11 PC (this will be the host PC)
- Both the host PC and the other computers are connected to the same network (Wi-Fi or Ethernet)
- You have administrator access on the host PC
- The printer has its driver installed on the host machine and is working correctly
If your printer supports Wi-Fi Direct or has its own network card, you may be able to connect it directly to the router instead. This guide focuses on the more common setup — one PC shares the printer with the rest of the network.
Step 1: Enable Network Discovery and File Sharing
Before sharing the printer, Windows 11 needs to be able to see and communicate with other devices on the network. This setting is sometimes turned off by default.
- Press Windows + I to open Settings.
- Go to Network & internet → Advanced network settings → Advanced sharing settings.
- Under Private networks, make sure both of these are turned on:
- Network discovery
- File and printer sharing
- Click Save changes.
If your network is set to Public, switch it to Private first. Windows restricts sharing on public networks for security reasons.
To change the network profile:
- Go to Settings → Network & internet.
- Click your active connection (Wi-Fi or Ethernet).
- Under Network profile type, select Private.
Step 2: Share the Printer from the Host PC
Now you’ll enable sharing on the printer itself.
- Press Windows + I and go to Bluetooth & devices → Printers & scanners.
- Click on the printer you want to share.
- Select Printer properties.
- Go to the Sharing tab.
- Check the box that says Share this printer.
- Give it a share name — something simple like
OffPrinterorHP-Shared. Avoid spaces if other computers on your network run older versions of Windows. - Click Apply, then OK.
The printer is now shared. Other PCs on the same network can now find and connect to it.
Tip: The host PC must be turned on and not in sleep mode for other computers to print. If the host goes to sleep, shared printing will stop working. Adjust your power settings if this becomes an issue.
Step 3: Connect to the Shared Printer from Another PC
Now move to any other Windows 11 PC on the same network and follow these steps to connect.
Method A: Add via Settings (Easiest)
- Press Windows + I → go to Bluetooth & devices → Printers & scanners.
- Click Add a printer or scanner.
- Windows will automatically scan the network. Wait a moment — the shared printer should appear in the list.
- Click on it and select Add device.
Windows will install the necessary driver and the printer will be ready to use.
Method B: Add via Network Path (More Reliable)
If the printer doesn’t show up automatically, use this method.
- Press Windows + R to open the Run dialog.
- Type the following, replacing the values with your actual host PC name and printer share name:
\\HostPCName\PrinterShareNameExample:\\DESKTOP-JOHN\HP-Shared - Press Enter.
- Windows will connect to the printer and install the driver automatically.
To find your host PC name: on the host machine, go to Settings → System → About and look under Device name.
Method C: Add via IP Address
If the above methods don’t work, you can connect using the host PC’s local IP address.
- On the host PC, open Command Prompt and type
ipconfig. Note the IPv4 Address (something like192.168.1.105). - On the other PC, press Windows + R and type:
\\192.168.1.105\PrinterShareName - Press Enter and follow the prompts.
Step 4: Set the Shared Printer as Default (Optional)
If this is the printer you’ll use most often on the second PC, set it as the default.
- Go to Settings → Bluetooth & devices → Printers & scanners.
- Click on the shared printer.
- Select Set as default.
Now every application will send jobs to this printer unless you manually choose a different one.
How to Share a Printer Using a Homegroup Alternative
Windows 11 removed the Homegroup feature that made sharing easier in older versions of Windows. The good news is that the methods above work just as well — but here are a few extra tips to make network sharing smoother.
Use the Same Microsoft Account
If all PCs on your network are signed into the same Microsoft account, Windows 11 handles some sharing permissions automatically. This reduces the chance of being asked for a username and password when connecting to a shared printer.
Use a Local Account with a Password
If computers on your network use local accounts (not Microsoft accounts), make sure the host PC’s local account has a password set. Passwordless accounts can cause authentication issues when other PCs try to connect to a shared resource.
To check: go to Settings → Accounts → Sign-in options and make sure a password is configured.
Managing Permissions on a Shared Printer
By default, Windows shares the printer with everyone on the network. If you want to restrict who can use it:
- Open Printer properties on the host PC (same as Step 2).
- Go to the Security tab.
- You’ll see a list of users and groups. By default, Everyone has Print permission.
- To restrict access, remove Everyone and add specific user accounts instead.
- Click Apply, then OK.
This is useful in an office environment where you don’t want all network users printing to an expensive colour printer without authorisation.
How to Share a Network Printer Using a Print Server
For larger offices or situations where the host PC can’t stay on all the time, a dedicated print server is a better solution.
A print server is a small device (or a router with built-in USB sharing) that connects directly to the printer and handles all print jobs independently of any PC. Popular options include:
- TP-Link TL-PS110U — affordable USB print server
- Iogear GPSU21W6 — supports multiple printers
- Router with USB port — many modern routers have a USB sharing function built in
With a print server, the printer is always available on the network, regardless of whether any PC is on. Setup varies by device, but most come with a configuration utility and a web interface.
Troubleshooting: Common Problems and Fixes
The shared printer doesn’t appear in the list
- Make sure both PCs are on the same network and using the Private profile
- Confirm Network discovery and File and printer sharing are enabled on the host
- Try connecting via the network path method (Method B above) instead of automatic detection
- Temporarily disable the firewall on the host PC to test if it’s blocking discovery
“Windows cannot connect to the printer” error
This is one of the most common errors. Try these fixes:
- Make sure the printer share name has no spaces or special characters
- Restart the Print Spooler service on both PCs (
services.msc→ Print Spooler → Restart) - On the connecting PC, open Command Prompt and run:
net use \\HostPCName\PrinterShareName - Try connecting using the IP address instead of the PC name
Windows asks for a username and password
This happens when the host PC requires authentication.
- Enter the host PC’s local username and password (not a Microsoft account email)
- If the host PC has no password, go to Settings → Accounts → Sign-in options and add one
- Alternatively, enable Guest or public sharing in Advanced sharing settings to allow connections without a password (less secure)
The printer is visible but print jobs don’t go through
- Check that the host PC is on and not in sleep mode
- Clear the stuck print queue on both the host and the connecting PC (see our guide on fixing stuck print queues)
- Reinstall the printer driver on the connecting PC
- Make sure the printer isn’t set to offline mode: go to Printers & scanners, click the printer, and check its status
The connection works but then stops after a while
This is usually caused by the host PC going to sleep. Fix it by:
- Going to Settings → System → Power & sleep on the host PC
- Setting Sleep to Never when plugged in, or at least to a long duration
Quick Comparison: Sharing Methods at a Glance
| Method | Best For | Difficulty |
|---|---|---|
| Settings → Add Printer | Home users, automatic setup | Easy |
| Network Path (\PCName\Printer) | When auto-detect fails | Easy |
| IP Address Path | When PC name doesn’t resolve | Easy |
| Print Server Device | Offices, always-on printing | Medium |
| Router USB Sharing | Small offices, no host PC | Medium |
FAQ
Can I share a printer between Windows 11 and Windows 10 PCs?
Yes. The process is the same on both ends. Windows 10 and Windows 11 can discover and use shared printers from each other without any special configuration, as long as both are on the same network and sharing is enabled.
Does the host PC need to be on for others to print?
Yes, if you’re using the standard PC-sharing method. The host computer must be on and awake for other PCs to send print jobs. If you need always-on printing, use a dedicated print server or a network-capable printer.
Why can’t the other PC find the printer automatically?
Usually it’s because network discovery is turned off, or the two PCs are on different networks (one on Wi-Fi and one on Ethernet connected to a different router). Double-check that both PCs are on the same local network and that sharing settings are enabled on the host.
Do I need to install a driver on the connecting PC?
Windows usually installs the driver automatically when you connect to a shared printer. If it can’t find the right driver, you may need to download it manually from the printer manufacturer’s website and install it before connecting.
Is it safe to share a printer over a network?
Yes, as long as your network is private and password-protected. Avoid sharing printers on public or open Wi-Fi networks. You can also restrict access by editing the printer’s Security tab to allow only specific user accounts.
Can I share a wireless printer over the network the same way?
If the wireless printer is connected to a PC, yes — follow the same steps. If the wireless printer connects directly to your router (most modern wireless printers do), you don’t need to share it through a PC at all. Just add it via Settings → Printers & scanners on each computer and the printer will be found automatically.
What if I get error 0x0000007c when connecting?
This is a known Windows 11 bug related to a specific update. Microsoft released a fix, but if you’re still seeing it, go to Settings → Windows Update and install all available updates. Alternatively, download and install the printer driver manually from the manufacturer’s site and connect using the IP address method.
Final Thoughts
Sharing a printer over a network in Windows 11 is straightforward once you know the steps. Enable sharing on the host PC, make sure network discovery is on, and connect from other computers via Settings or a direct network path.
If automatic detection doesn’t work, the network path method almost always does. And if you need something more permanent and reliable, a print server is worth the small investment.
Once it’s working, you’ll wonder why you ever bothered walking across the office to plug in a cable.
