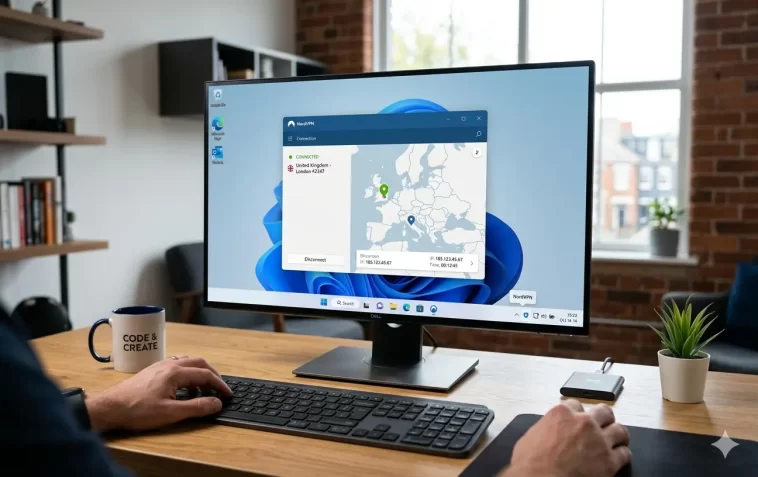
Setting up a VPN on Windows 11 is one of the best things you can do to protect your online privacy. Whether you’re working from home, using public Wi-Fi, or just want to keep your browsing private, a VPN makes a real difference. The good news? Windows 11 makes it easier than ever.
In this guide, I’ll walk you through everything — from choosing the right VPN to connecting for the first time.
Why You Should Use a VPN on Windows 11
Before we get into the setup steps, it’s worth understanding why a VPN matters.
A VPN (Virtual Private Network) encrypts your internet connection and hides your real IP address. This means:
- Your ISP can’t see what you’re browsing
- Hackers on public Wi-Fi can’t intercept your data
- Websites can’t track your actual location
- You can access content that’s restricted in your region
If you use your laptop at coffee shops, airports, or hotels, a VPN isn’t optional — it’s necessary.
Two Ways to Set Up a VPN on Windows 11
There are two main approaches, and the right one depends on your situation.
Option 1: Use a VPN App (Recommended) This is the easiest route. Services like NordVPN, ExpressVPN, or ProtonVPN offer dedicated Windows apps. You download, install, log in, and hit Connect. Done.
Option 2: Set Up a VPN Manually in Windows 11 Settings This is useful if your company or school gave you VPN credentials (server address, username, password). You configure the connection directly in Windows without installing any third-party app.
I’ll cover both methods below.
Method 1: Setting Up a VPN App on Windows 11
This is the method most people will use for personal privacy.
Step 1: Choose a VPN Provider
Pick a reputable VPN service. A few reliable ones:
- NordVPN — Fast, large server network, beginner-friendly
- ExpressVPN — Excellent speeds, great for streaming
- ProtonVPN — Privacy-focused, has a free tier
- Mullvad — Anonymous and privacy-first
Avoid free VPNs from unknown providers. Many of them log your data and sell it — which defeats the whole purpose.
Step 2: Download and Install the VPN App
- Go to the official website of your chosen VPN
- Click Download and select the Windows version
- Run the installer and follow the on-screen prompts
- Launch the app and sign in with your account
Step 3: Connect to a VPN Server
Once you’re logged in:
- Open the VPN app
- Choose a server location (or let the app pick the fastest one automatically)
- Click Connect
That’s it. You’ll see a confirmation that the VPN is active — usually a green icon or “Connected” status. Your traffic is now encrypted.
Method 2: Manually Set Up a VPN on Windows 11 (Built-In Settings)
This method works if you have VPN credentials from your workplace, school, or a manual VPN provider.
Step 1: Open Windows 11 VPN Settings
- Click the Start menu and open Settings
- Go to Network & Internet
- Click VPN in the left sidebar
Step 2: Add a VPN Connection
Click Add VPN at the top of the page. A form will appear.
Fill in the following fields:
- VPN provider: Select Windows (built-in)
- Connection name: Give it any name you like (e.g., “Work VPN” or “My VPN”)
- Server name or address: Enter the server address provided by your VPN service or IT department
- VPN type: Choose the protocol — common options are IKEv2, L2TP/IPsec, or PPTP (IKEv2 is recommended for most cases)
- Type of sign-in info: Usually Username and password
- Username and Password: Enter your credentials
Click Save when done.
Step 3: Connect to the VPN
- Go back to Settings > Network & Internet > VPN
- Find your newly created VPN connection
- Click on it and hit Connect
Windows will authenticate and establish the VPN tunnel. You’ll see it listed as Connected once it’s active.
Bonus: Connect Quickly from the Taskbar
You can also connect to your VPN without opening Settings:
- Click the Network icon in the taskbar (bottom right)
- Click the > arrow next to your Wi-Fi or Ethernet connection
- Your VPN should appear in the list — click it and hit Connect
How to Check If Your VPN Is Working
Once connected, it’s smart to verify things are actually working.
Check your IP address:
- Open your browser and search “what is my IP”
- The IP address shown should match the VPN server location — not your real location
If the IP still shows your home city, the VPN isn’t working properly. Try reconnecting or switching servers.
Test for DNS leaks: Visit a site like dnsleaktest.com and run the test. If your real ISP shows up in the results, you have a DNS leak — meaning your real identity is partially exposed even with the VPN on. In that case, switch to a VPN provider that offers DNS leak protection.
Tips for Getting the Best VPN Performance on Windows 11
A VPN will slightly reduce your internet speed — that’s normal. But there are ways to minimize the impact.
- Choose a server close to you — The further the server, the higher the latency
- Use IKEv2 or WireGuard protocols — They’re faster than older protocols like PPTP or L2TP
- Avoid connecting through overcrowded servers — Premium VPNs let you see server load
- Use a wired connection — Wi-Fi + VPN together can sometimes slow things down noticeably
- Enable split tunneling (if available) — This lets you route only certain apps through the VPN, keeping others on your regular connection
Common VPN Problems on Windows 11 (And How to Fix Them)
VPN Won’t Connect
- Double-check your credentials and server address
- Try a different VPN protocol (switch from L2TP to IKEv2, for example)
- Temporarily disable Windows Firewall to see if it’s blocking the connection
- Restart your router and try again
VPN Keeps Disconnecting
- Enable the Kill Switch in your VPN app if available — this maintains security even when the connection drops
- Check if your internet connection itself is stable
- Update your VPN app to the latest version
Slow Speeds with VPN
- Switch to a closer server
- Switch to WireGuard protocol if your VPN supports it
- Try connecting at a different time — server load varies throughout the day
VPN Connected But No Internet
- Try flushing your DNS: open Command Prompt as admin and run
ipconfig /flushdns - Disable IPv6 in your network adapter settings (some VPNs have compatibility issues with IPv6)
- Reinstall the VPN app
VPN Protocols Explained (Quick Reference)
When setting up a VPN manually, you’ll need to pick a protocol. Here’s a quick breakdown:
| Protocol | Speed | Security | Best For |
|---|---|---|---|
| WireGuard | Very Fast | Excellent | General use, gaming |
| IKEv2 | Fast | Very Good | Mobile, switching networks |
| OpenVPN | Moderate | Excellent | Privacy-focused users |
| L2TP/IPsec | Moderate | Good | Compatibility |
| PPTP | Fast | Weak | Not recommended |
Stick with WireGuard or IKEv2 for most use cases on Windows 11.
Should You Use a Free VPN?
It’s tempting, but the answer is almost always no.
Free VPNs often:
- Log your browsing data and sell it to advertisers
- Have data caps (usually 500MB–2GB per month)
- Offer slow, overcrowded servers
- Lack proper encryption standards
If you’re on a budget, ProtonVPN’s free tier is one of the few trustworthy options — it has no data cap, though server selection is limited.
For real privacy and performance, a paid VPN is worth the few dollars per month.
Frequently Asked Questions (FAQ)
Is using a VPN on Windows 11 legal?
Yes, in most countries using a VPN is completely legal. A small number of countries restrict or ban VPN use (such as China, Russia, and North Korea), but in the US, UK, EU, and most of the world, VPNs are legal tools.
Does Windows 11 have a built-in VPN?
Windows 11 has built-in support for connecting to VPN services, but it doesn’t include a VPN service itself. You still need to provide server credentials from a VPN provider or your organization.
Will a VPN slow down my internet on Windows 11?
A small reduction in speed is normal — typically 10–30% depending on the VPN and server distance. Using a modern protocol like WireGuard and a nearby server will minimize this.
Can I use a VPN on Windows 11 for free?
Yes, but with limitations. ProtonVPN offers a decent free plan. Most other free VPNs have serious privacy concerns or performance issues. For regular use, a paid plan is the better choice.
What’s the difference between a VPN app and Windows built-in VPN?
A VPN app is easier to use and usually includes extra features like a kill switch, DNS leak protection, and automatic server selection. The Windows built-in VPN connection requires you to manually enter server details and offers fewer features, but works fine for company or school VPNs.
Does a VPN protect me on public Wi-Fi?
Yes, and this is one of the best reasons to use one. On public Wi-Fi, a VPN encrypts your traffic so no one on the same network can snoop on what you’re doing.
Should I leave my VPN on all the time?
It depends. If privacy is your main concern, yes — keeping the VPN on all the time makes sense. If you’re mostly worried about public Wi-Fi specifically, you can turn it on only when needed. Keeping it always on has minimal downsides with a quality VPN.
Final Thoughts
Setting up a VPN on Windows 11 doesn’t have to be complicated. If you just want personal privacy, download a reputable VPN app, log in, and hit Connect. If you need a manual setup for work or school, the Windows 11 built-in VPN settings walk you through it step by step.
Either way, once it’s set up, the protection runs quietly in the background — and that peace of mind is worth it.
If you found this guide helpful, bookmark it for later or share it with someone who’s been putting off setting up their VPN.
