Plugged an external monitor into my MacBook Air for the first time expecting it to just work, and it did — right up until I tried adding a second one and got nothing but a blank screen. Turns out there’s more to this than just finding the right cable, especially depending on which MacBook you own. Here’s the actual setup process, plus the one limitation that trips up almost everyone eventually.
Quick Answer
- Connect your monitor’s cable (USB-C, Thunderbolt, or HDMI) directly to a port on your MacBook, then go to System Settings > Displays to confirm it’s detected.
- Base M1 and M2 MacBooks support exactly one external display natively — no cable or adapter changes that.
- Base M3 MacBooks can drive two, but only with the lid closed (clamshell mode).
- M4 and newer base chips finally support two external displays with the lid open.
- If you need more displays than your chip natively allows, a DisplayLink-certified dock is the standard workaround.
Why This Trips People Up
So the confusing part about connecting external monitors to a MacBook isn’t the cable — it’s that the number of displays you can drive depends on which chip is inside your specific Mac, not on how many ports you have or what dock you buy. Apple‘s entry-level chips have a genuine hardware-level display controller limit, and no cable trick, macOS update, or adapter changes that ceiling on its own.
Base M1 and M2 chips have a single external display pipeline. This is a hardware limitation Apple built into the entry-level chip generations, and it applies whether you’re using HDMI, USB-C, or Thunderbolt — the port type doesn’t matter, only the chip does.
Base M3 chips can do two displays, but only in clamshell mode. With the lid closed, using an external keyboard, mouse, and power connection, the base M3 MacBook Air and Pro can drive two external displays instead of one. Opening the lid drops back to a single external display.
M4 and newer base chips lifted the lid-open restriction. This was the first time Apple’s entry-level chip could drive two external displays with the laptop’s own screen still active — no clamshell mode required.
Pro and Max chip variants have always supported multiple displays natively. If you’ve got an M-series Pro or Max chip in your MacBook Pro, this whole limitation doesn’t apply to you — those chips were built with multiple display pipelines from the start.
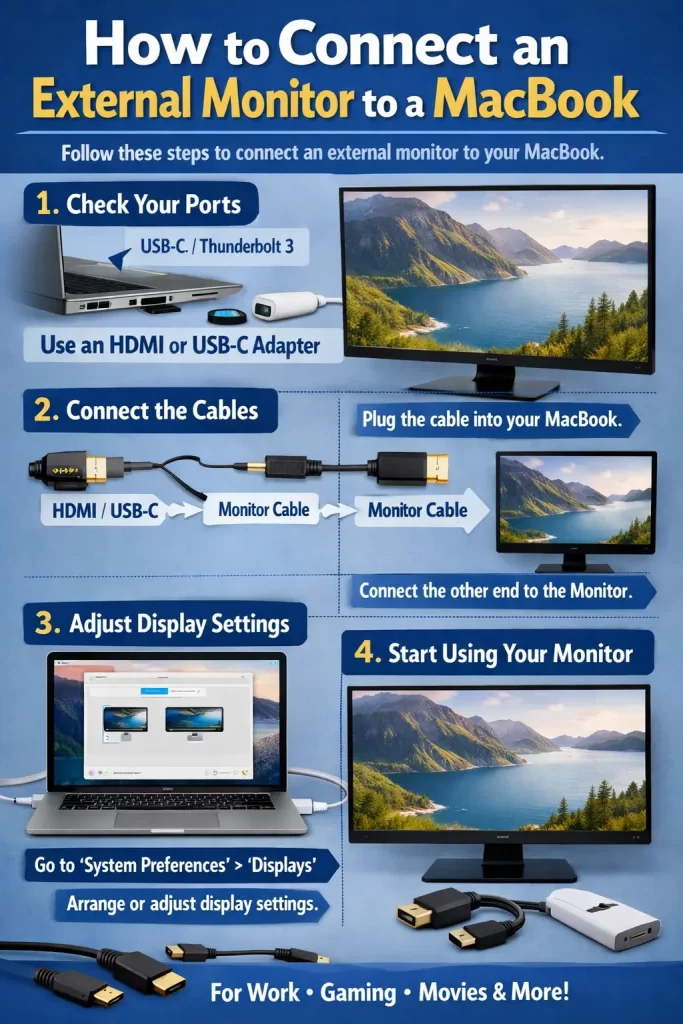
Step-by-Step: Connecting Your First External Monitor
Step 1: Identify your MacBook’s ports
Most current MacBooks use USB-C or Thunderbolt ports exclusively. If your monitor uses HDMI, you’ll need a USB-C to HDMI cable or adapter unless you’re on an older Intel MacBook Pro with a built-in HDMI port.
Step 2: Connect the cable directly to your MacBook
Plug the cable straight into one of your MacBook’s Thunderbolt or USB-C ports. And if you’re using an adapter or dongle, plug that in first, then connect the monitor cable to it.
Step 3: Power on the monitor and select the correct input
Most monitors have multiple input sources (HDMI 1, HDMI 2, DisplayPort, USB-C), so make sure the display is set to the input you actually plugged into — this catches more people than you’d expect, especially on monitors with several ports.
Step 4: Check System Settings > Displays
Open the Apple menu, go to System Settings, then Displays. Your MacBook should detect the new monitor automatically within a few seconds. If it doesn’t show up, try unplugging and reconnecting the cable, or test a different port on your Mac.
Step 5: Arrange your displays
In the Displays panel, click Arrange and drag the display icons to match how your monitor and MacBook are actually positioned on your desk — this determines which direction your cursor moves when crossing between screens. If the monitor is set to mirror your MacBook’s screen instead of extending it, switch it to “Extended Display” from the same panel.
Step 6: Adjust resolution and refresh rate
Still in the Displays panel, select your external monitor and choose the resolution and refresh rate you want. macOS usually picks a sensible default, but higher-end monitors sometimes need manual selection to hit their maximum supported refresh rate.
Connecting a Second External Display (If Your Chip Supports It)
If you’re on a base M1 or M2 MacBook, skip to the next section — native dual external display support isn’t available on these chips regardless of setup order.
For M4 and newer base chips: plug each monitor into its own port and arrange them the same way as a single display, through System Settings > Displays.
For base M3 chips: you’ll need clamshell mode specifically.
- Connect an external keyboard and mouse (Bluetooth or USB).
- Connect your MacBook to power.
- Plug in the first monitor and confirm it’s working.
- Close the MacBook’s lid.
- Plug in the second monitor.
The setup order matters here — plugging in the second monitor before closing the lid, or before the first one is confirmed working, is a common reason this doesn’t work on the first attempt.
Adding More Displays Than Your Chip Natively Supports
If you’re on a base M1, M2, or M3 chip and need more external displays than your native limit allows, a DisplayLink-certified dock or adapter is the standard workaround. DisplayLink works by compressing video data in software and sending it over USB rather than relying on the chip’s native display pipeline, which sidesteps the hardware limit entirely.
Worth knowing before you buy one: DisplayLink connections cap out around 60Hz, use a small amount of CPU overhead, and — this one catches people off guard — copy-protected streaming content like Netflix, Disney+, or Apple TV+ will stop playing on all connected displays, not just the DisplayLink one, as soon as a DisplayLink display is active. If you mainly need the extra screen for documents, code, or spreadsheets rather than video playback, this tradeoff is usually a non-issue. If streaming matters to you, it’s worth factoring in before purchasing a dock.
Common Issues
Monitor not detected at all. Try a different USB-C or Thunderbolt port on your Mac, and confirm the cable itself supports video — not every USB-C cable does, particularly cheaper charging-only cables.
Screen flickering or dropping the connection intermittently. Usually a cable or adapter issue rather than a macOS problem. Testing with a different cable is the fastest way to rule this in or out.
Display shows a black screen after connecting a DisplayLink dock. This is often the DRM/copy-protection behavior mentioned above, especially if you were mid-stream on a video service when the dock connected. Also worth checking that DisplayLink Manager has Screen Recording permission enabled in System Settings > Privacy & Security, since macOS blocks the driver without it.
Not sure which chip your MacBook has. Click the Apple menu, select About This Mac, and check the Chip field — this tells you immediately whether you’re dealing with a base chip’s single-display limit or a Pro/Max chip with broader native support.
FAQ
Do I need a special cable for 4K or higher resolutions? Not usually a special cable, but a low-quality or underspecced USB-C cable can bottleneck resolution and refresh rate — a Thunderbolt-rated or USB-C cable specifically rated for video/data (not just charging) is worth using for higher resolutions.
Can I use my MacBook with the lid closed and just the external monitor? Yes, this is standard clamshell mode — connect an external keyboard, mouse, and power source, connect the monitor, and close the lid. macOS will use the external display as the primary screen.
Does the M4 MacBook Air support three external displays? No — the base M4 chip supports two external displays with the lid open, not three. Three or more without DisplayLink requires a Pro or Max chip.
Will a docking station give me more displays than my chip allows? Only if that specific dock includes DisplayLink or a similar software-based technology — a plain USB-C hub or dock without that chip built in won’t bypass the native display limit no matter how many ports it has.
Editor’s Opinion
the whole “it depends on the chip not the ports” thing is genuinely the one piece of info that saves you the most confusion here. check your chip in about this mac before you buy any dock or adapter, save yourself a return shipment.
