I used to keep every window crammed onto one desktop until a coworker watched me dig through fifteen overlapping windows looking for a Finder window and just said “you know you can make more desktops, right?” Turns out creating Spaces on a MacBook takes about five seconds once you know where to look — Apple just doesn’t call them virtual desktops, which trips people up coming from Windows.
Here’s how to set them up and actually use them without getting lost.
Quick Answer
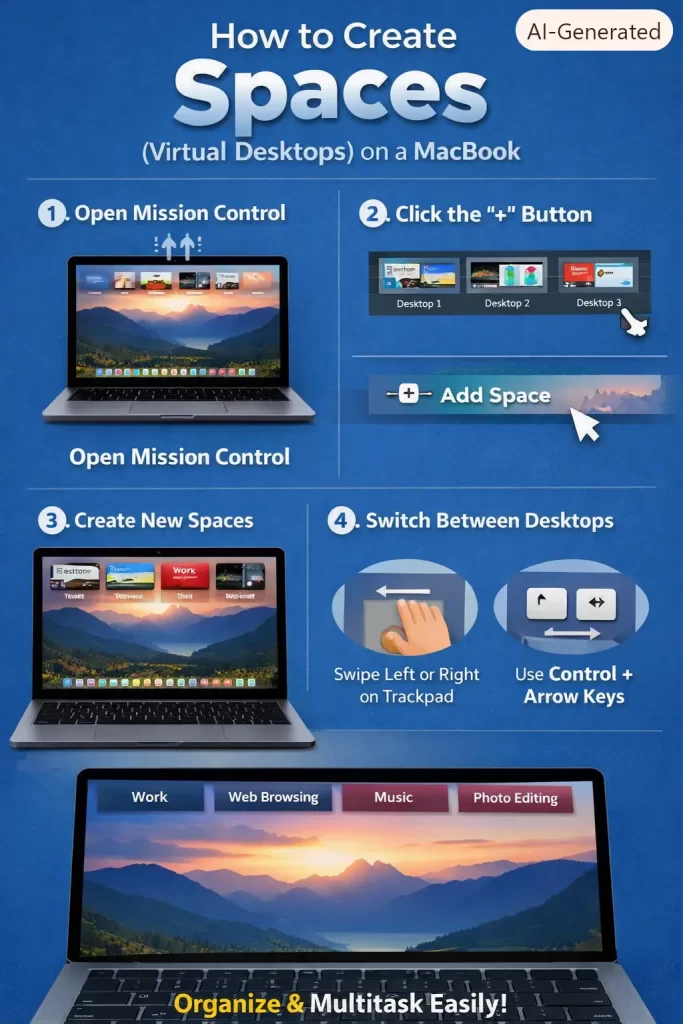
- Open Mission Control (swipe up with three or four fingers, press F3, or press Control + Up Arrow)
- Move your cursor to the top-right corner of the screen and click the + button
- A new Space appears in the Spaces bar at the top — click its thumbnail to switch to it
- You can create up to 16 Spaces total
- Switch between them with a three or four-finger swipe left/right, or Control + Left/Right Arrow
Creating a New Space
- Open Mission Control. Any of these work: swipe up with three or four fingers on the trackpad, press the F3 key (or the dedicated Mission Control key on some keyboards), or press Control + Up Arrow.
- Move your cursor toward the top-right corner of the screen. A + button will appear in the Spaces bar.
- Click the + button.
- A new Space gets added, labeled Desktop 2 (or the next available number). Click its thumbnail to jump into it.
That’s the whole process. Each new Space you add just increases the number — Desktop 3, Desktop 4, and so on, up to a max of 16.
One thing worth knowing going in: macOS doesn’t let you rename these to something like “Work” or “Design.” They stay Desktop 1, Desktop 2, etc. unless you use a third-party app. So if you want to tell them apart visually, the built-in trick is assigning each one a different wallpaper.
Switching Between Spaces
Once you’ve got more than one Space, you’ll want a fast way to move between them without opening Mission Control every time:
- Trackpad: swipe left or right with three or four fingers, depending on your trackpad gesture settings
- Keyboard: press Control + Left Arrow or Control + Right Arrow
- Magic Mouse: swipe left or right with two fingers
- From Mission Control: click directly on the thumbnail of the Space you want
And if you’re coming from Windows, note that the Ctrl+1 through Ctrl+9 shortcuts for jumping straight to a specific Space aren’t turned on by default — you’ll need to enable them yourself.
Assigning Apps to a Specific Space
This is what actually makes Spaces useful instead of just being extra empty desktops.
- Open the app you want to assign.
- Right-click (or Control-click) its icon in the Dock.
- Hover over Options.
- Choose This Desktop to keep it fixed on your current Space, or All Desktops if you want it visible everywhere.
So you could keep Mail and Slack on Desktop 1, your code editor on Desktop 2, and a browser on Desktop 3, and each one stays put instead of all piling into the same view.
Giving Each Space a Different Wallpaper
Since Spaces can’t be renamed, a different desktop picture per Space is the easiest way to tell them apart at a glance.
- Open System Settings.
- Go to Wallpaper.
- First, apply System Settings’ wallpaper option to all desktops as a baseline.
- Then switch into each individual Space and change its wallpaper separately from there.
It’s a small thing, but it genuinely helps — glancing at a Space and instantly knowing “this is my work desktop” beats squinting at a tiny number in the corner.
Adjusting Mission Control Settings
Go to System Settings > Desktop & Dock, then scroll to Mission Control. A few settings worth knowing about here:
- Automatically rearrange Spaces based on most recent use — this is on by default, and it reorders your Spaces as you switch between them. If you rely on a specific Space always being in the same position (or on a specific keyboard shortcut number), turn this off.
- Displays have separate Spaces — if you use multiple monitors, this lets each display run its own independent set of Spaces rather than sharing one set across all screens.
- When switching to an application, switch to a Space with open windows for the application — handy if you tend to forget which Space an app is currently open on.
FAQ
Can I rename a Space on Mac? Not natively, no. macOS sticks with Desktop 1, Desktop 2, and so on. Third-party apps exist that add custom names if that matters enough to you.
How many Spaces can I create on a Mac? Up to 16.
Do full-screen apps count as their own Space? Yes — when you make an app full-screen, macOS automatically turns it into its own separate Space in the Spaces bar.
Why do my Spaces keep reordering themselves? That’s the “Automatically rearrange Spaces based on most recent use” setting. Turn it off in System Settings > Desktop & Dock > Mission Control if you want your Spaces to stay in a fixed order.
Editor’s Opinion
spaces are one of those features that sound pointless until you actually assign apps to specific desktops, then it clicks. turn off the auto-rearrange setting immediately though, it’s the most confusing default apple ships and it makes your keyboard shortcuts stop lining up with the desktop you expect.
